Troubleshooting guide › Specialised welding › Tube-to-tubesheet welding

Tube-to-tubesheet welding problems: leaks, pinholes at start and stop, uneven bead, torch centring, flush vs protruding tubes

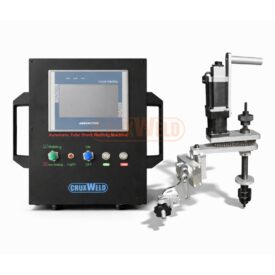
A heat-exchanger tube weld is a small circle, hundreds of times over, and every one must be leak-tight. The machine takes the operator’s hand out of it: a mandrel centres the head in the tube, the torch rotates through a set angle and returns. What is left for the operator is the set-up: centring, tube projection, torch angle and offset, the start and stop overlap, and clean, dry tubes. Those are where leaks come from.

Covers: TubeSeal H89 CO2 / MIG tube-to-tubesheet welding head (tube bores 28-76 mm), with a MIG power source and feeder; flush, recessed and protruding tube joints on carbon steel and stainless tubesheets.

Reviewed by the Cruxweld technical team, October 2026. Settings are starting points to confirm on a test piece; acceptance is decided by the code or drawing the job is built to. Checks marked “call” are for our technical team.

Before you start: Confirm the head is clamped and cannot be moved by hand before every weld. Keep flammables at least 50 cm away; ventilate or extract. Power off before cleaning the head.

Set-up checks before the first tube

  1. Tensioning block by tube bore (28-76 mm) fastened to the shaft; faces clean and undamaged; positioning block not worn (a worn block sits the head crooked and the weld misses the joint).
  2. Insert until the positioning block sits squarely on the tubesheet; lock nut turned right; head cannot be moved by hand.
  3. Torch angle set on the fixture (plus or minus 90 degrees), X and Y set with the fine slider; manual forward and reverse to the start point; set origin.
  4. Rotation angle (set position) with overlap: 360 degrees plus the overlap you need (for example 380-400 degrees) so the stop runs back over the start; welding speed set; origin and return speed set.
  5. Gas flowing and the feeder ready before Start; nozzle and contact tip clean.
  6. Weld one tube, cut or macro it, and check root fusion and leg size before the batch.

Faults, most likely first, and the fix for each

1Weld leaks on hydrotest or helium test

Lack of fusion into the tubesheet or the tube at one part of the circumference: torch off-centre, projection wrong so the arc favours one side, dirt or moisture in the tube-to-sheet gap, expansion not done or done after welding.

Fix: Centre the head (worn positioning block replaced); set projection as the procedure requires (usually 1-3 mm for a fillet on a protruding tube); clean and dry tubes and sheet, degrease; light expansion before welding to close the gap, final expansion after; macro the first joint.

2Pinhole or crater at the start/stop point

Stop lands on the start without overlap, or the crater is not filled; wire burnback leaving a ball; gas post-flow short.

Fix: Set the rotation angle beyond 360 degrees so the weld overlaps its start by 15-30 degrees; crater fill on the power source; post-flow on; snip the wire ball before the next tube.

3Bead uneven around the circumference

Head not square (positioning block worn or not seated), torch angle changing as the cable wraps, speed uneven, tube not round or not flush with its neighbours.

Fix: Re-seat and check squareness; route the torch cable so it does not pull as the head rotates; clean the slide ways; check tube projection with a gauge at four points.

4Burn-through into the tube wall

Too much current or too slow for a thin tube; torch aimed too far onto the tube; projection too long.

Fix: Reduce current or raise speed; aim at the joint or slightly onto the sheet; shorten the projection.

5Lack of fusion into the tubesheet, bead sits on the tube

Torch aimed at the tube; current too low for the thick sheet; sheet cold on the first tubes of a cold morning.

Fix: Aim more onto the sheet; raise current; a light preheat on thick sheets.

6Flush or recessed tubes: weld sinks, poor profile

No tube metal to form a fillet; the joint needs a groove or a filler-added seal weld with the torch angled into the sheet.

Fix: Use the procedure for flush tubes: torch angle into the sheet, lower speed, more wire; or specify a small projection at fit-up.

7Spatter and porosity

Gas, nozzle and tip as on any MIG weld; oil from tube rolling left in the joint.

Fix: See the MIG and porosity pages; degrease tube ends before fit-up.

8Head moves during the weld

Lock nut not tight; tensioning block undersized for the bore; worn faces.

Fix: Correct block; clean faces; lock and test by hand before every weld.

Daily care

  • Positioning block checked for wear before each shift; replaced in good time.
  • Fastening screw tight; tensioning block faces clean.
  • Lock nut thread clean and lightly oiled.
  • Slide ways of the fine slider free of spatter and dust.
  • Nozzle and contact tip clean; torch fixture without play.
  • Cables and gas hose undamaged; routed so rotation does not pull them.

Questions we get asked

Expand before or after welding?

Usually a light expansion before welding to close the gap and hold the tube, then the strength expansion after welding so it does not stress the fresh weld. Follow the exchanger drawing or code; it decides.

How do I verify centring without welding?

Rotate the head on manual speed with the arc off and watch the tip-to-joint distance all the way round; it should not change. Then weld one tube and macro-section it.

Models covered on this page

Open your model for its specifications; the spares page lists the consumables for it.

Welding or cutting problem rather than a machine fault?

If the machine runs but the weld or cut is wrong, the cause is usually settings, consumables or the material. Start here:

Does the machine matter?

The head gives repeatable centring and rotation; the MIG source and feeder give the arc. A fault that appears on every tube is set-up or consumables; a fault that appears on one tube is fit-up or cleanliness of that tube. Our team sets the first joints with your operator on a video call.

Still stuck?

Send a photo of the weld or cut, your machine model, consumable and plate thickness. Our technical team replies on WhatsApp with the likely causes and the next checks to make.

45+ years of welding expertise · GeM Registered OEM Manufacturer · Supported Worldwide

WhatsApp chat